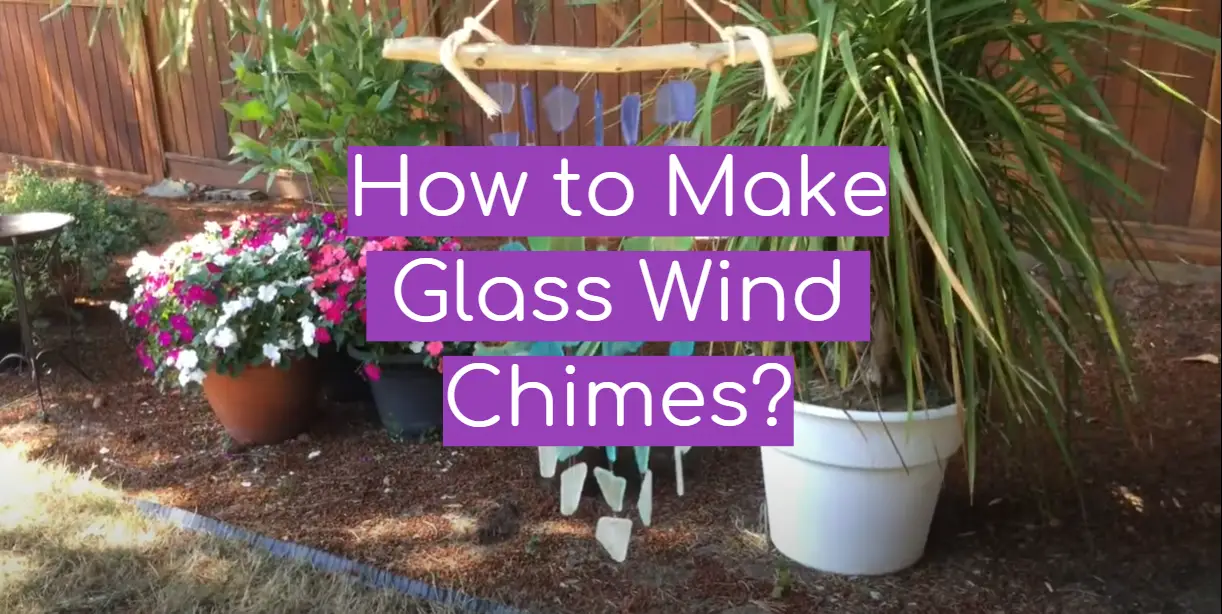
Looking to add a touch of nature to your home decor? Why not try making your own glass wind chimes? This guide will teach you everything you need to know about how to make glass wind chimes, from selecting the right materials to attaching the clapper. We’ll also provide product reviews of some of the best glass wind chime kits on the market, as well as some useful tips for making your creations last longer.
Table of Contents
Materials required to create glass wind chimes
Before we get started, let’s take a look at the materials you’ll need to create your own glass wind chimes. You’ll need:
- Glass beads or other decorations of your choice
- Wire for hanging
- Pipe cleaners or other wire for attaching beads and decorations
- A hammer
- A nail or drill bit (depending on the thickness of your wire) [1]
Step-by-step instructions for Make Glass Wind Chimes
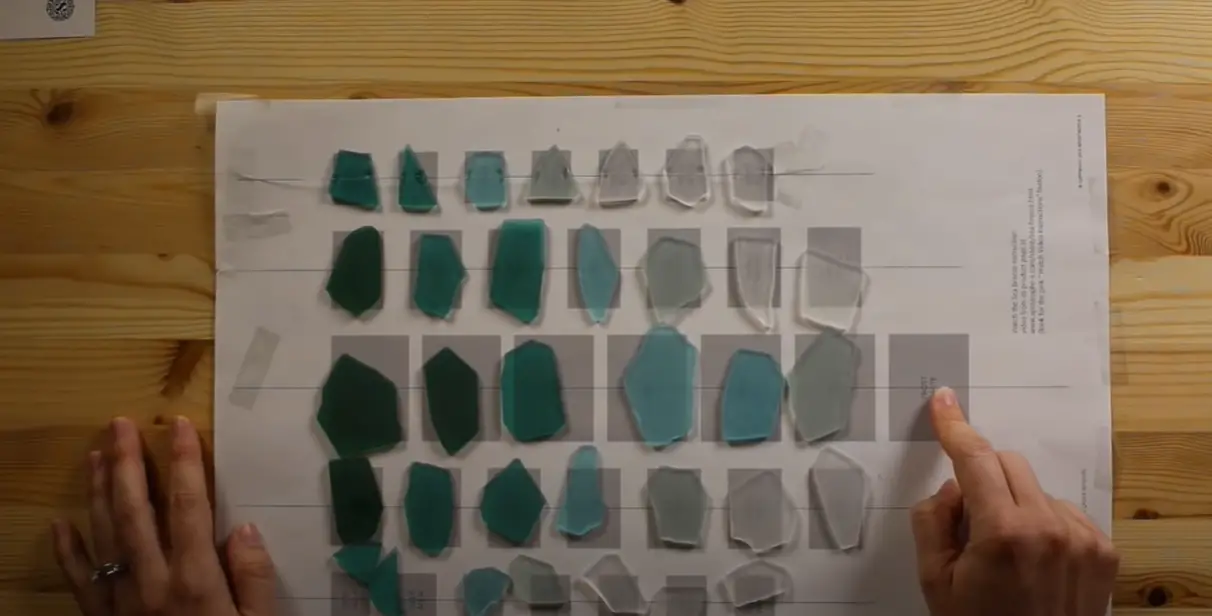
Print the free template
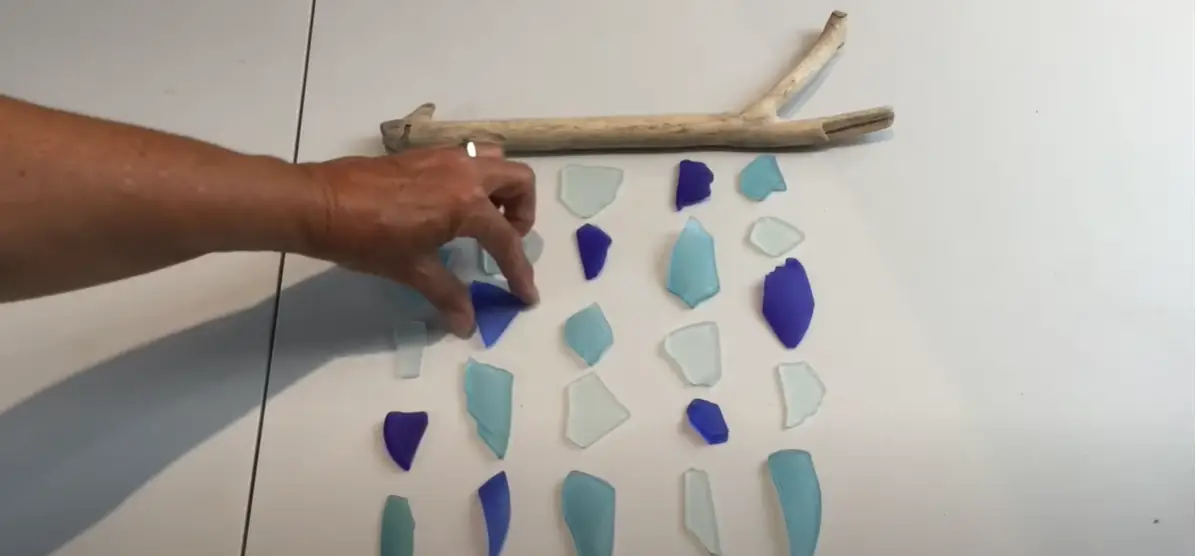
Sorting the sea glass pieces
Collecting the sea glass is only half of the fun, now it’s time to start sorting! The first step is to sort by color. I like to keep a separate pile for each color, that way I can easily find what I’m looking for when it’s time to start crafting. Once you’ve got all your colors sorted, it’s time to start thinking about shape. Wind chimes look best when they have a variety of shapes and sizes, so try to mix it up as much as possible. If you’re having trouble finding enough variety, don’t be afraid to raid your kids’ toy box – colorful plastic balls make great wind chimes! Now that you’ve got your materials sorted, it’s time to start crafting!If you’ve never made a wind chime before, don’t worry – it’s easy! The first step is to choose your top. This can be anything from a seashell to a piece of driftwood, it just needs to be sturdy enough to support your chimes. Once you’ve found the perfect top, it’s time to start attaching your sea glass pieces. I like to use fishing line for this, as it’s strong but not too visible. Start by tying a knot in the end of your fishing line, then threading it through each piece of sea glass in turn. When you’re happy with the arrangement, tie the other end of the line to your top and give it a little shake – if it sounds good, you’re done!If your chimes are looking a little sparse, don’t be afraid to add a few extra bits and pieces. Seashells, beads, and even small stones can all make great additions.
Assembling the sea glass wind chime
The next step is to assemble your sea glass wind chime. You will need the following materials:
- Sea glass in a variety of colors and sizes
- Wire cutter
- Pliers
- Twine or fishing line
- Glue (optional)
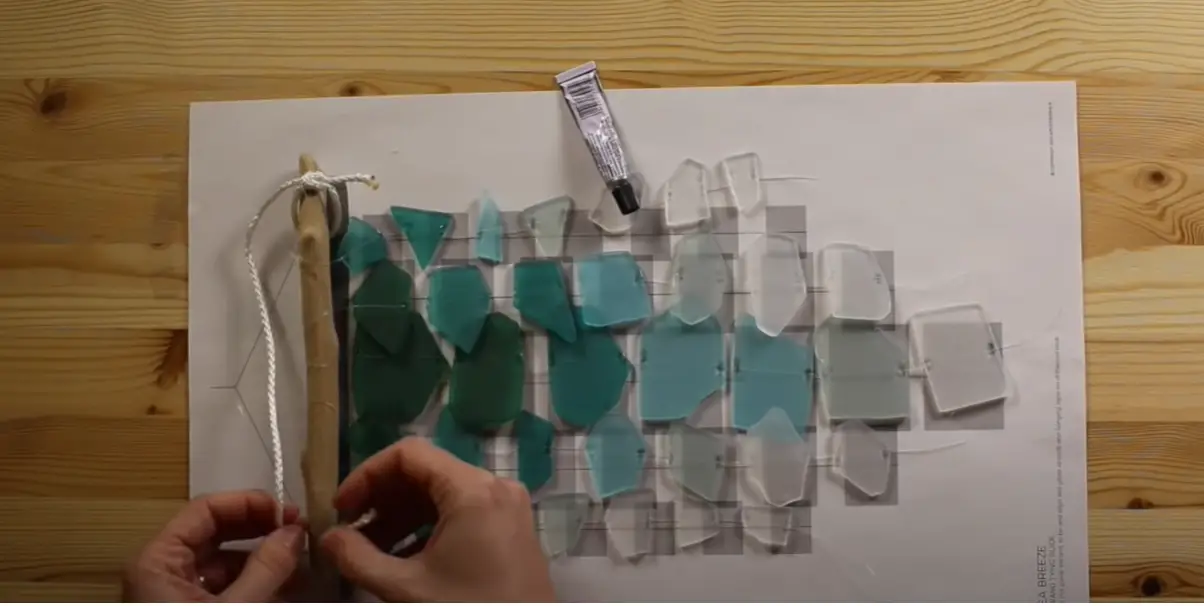
Instructions:Cut lengths of twine or fishing line, varying from about 12 inches to 24 inches. If you are using glue, put a small dab on the end of each piece of sea glass before threading it onto the string. Start with the larger pieces of sea glass and work your way down to the smaller ones. Once all of the sea glass is on the string, tie each end to one of the rings. [2]
The top of the sea glass wind chime
The clapper is the uppermost piece of sea glass on the wind chime. This is the part of the chime that makes contact with the glass and produces the sound. There are many different materials that can be used for this including metal, wood, or even plastic. You will want to choose a material that is durable and will not break easily. The next step is to add the glass beads or shells. These beads will help to catch the wind and produce a gentle tinkling sound. You can use any type of bead that you like but make sure they are all roughly the same size. If they are too small, they will not make much noise and if they are too large, they could fall off of the chime. Once you have added all of your beads, it is time to add the glass shards. These should be added last so that they do not fall off during the assembly process. Now that you have all of your materials, it is time to start assembling your wind chime. Begin by tying a knot at the top of the string. Then, thread each bead onto the string, followed by each piece of glass. Once you have reached the end of the string, tie another knot to secure all of the pieces in place.
Attaching the sea glass to the wood pieces
The next step is to take your fishing line and tie it around the top of each glass piece. Make sure that the knots are tight so that the glass will not fall off. Once you have done this, you can start attaching the sea glass to the wood pieces. Start by tying one end of the fishing line to the top of a wood piece and then threading it through the hole in each glass piece. When you get to the last glass piece, tie another knot so that it is secure. Repeat this process for each wood piece. Now that all of your sea glass is attached, you can start hanging them up! You can either hang them from a tree or from a shepherd’s hook. If you are hanging them from a tree, make sure that the hooks are not too tight so that the glass can move around and catch the light. If you are hanging them from a shepherd’s hook, you can adjust the height of each one so that they are all different. Now sit back and enjoy your beautiful new wind chimes! [3]
Tips for Make Glass Wind Chimes
If you’re looking for a fun and unique project to take on, why not try your hand at making glass wind chimes? These beautiful DIY decorations can add a touch of whimsy to any outdoor space, and they’re relatively easy to make with just a few supplies.
To get started, you’ll need some clear glass beads or marbles, fishing line or beading wire, and a few small charms or trinkets (optional). You’ll also need something to use as a base for your chime – we recommend an upcycled wine bottle or mason jar. Once you have your supplies gathered, simply follow these steps:
First, clean your chosen base thoroughly. If using a glass container, you can do this by soaking it in vinegar overnight.
Next, use a drill or sharp knife to make a small hole in the top of your base. This is where you’ll thread your fishing line or beading wire.
Now it’s time to start adding your beads! String them onto the line, leaving about six inches between each one. If you’re using charms or trinkets, be sure to add those now as well.
Once all of your beads are strung, tie a knot at the end of the line and trim any excess. Now find a place to hang your new wind chime and enjoy! [4]
FAQ
What is the best material to make wind chimes?
The best material to make wind chimes depends on what you are looking for in a chime. If you want a chime that has a mellow sound, then bamboo or wood might be the best option. If you want a chime with a brighter sound, then metal or glass might be better. Ultimately, it is up to you to decide what sounds best to you!
How do you make a fused glass wind chime?
To make a fused glass wind chime, you’ll need some clear or translucent glass, as well as any desired colors or patterns. You’ll also need a kiln, some wire for hanging the chimes, and something to use as a mold (a simple cookie cutter will work). First, cut your glass into small pieces using a stained glass cutter or other sharp tool. Next, arrange the pieces in your desired pattern on top of the mold. Make sure that the pieces are touching each other so that they will fuse together when heated. Once you’re happy with the arrangement, place the mold in the kiln and heat it to around 1500 degrees Fahrenheit. This will cause the glass to melt and fuse together. Allow the chime to cool completely before removing it from the mold and adding the wire for hanging.If you don’t have access to a kiln, you can also use a simple household oven to fuse your glass wind chime. Just preheat the oven to its highest setting and place the mold with the arranged glass inside. Check on it every few minutes until the glass is melted and fused together. This method won’t produce as strong of a bond as using a kiln, but it will still work well enough for most purposes.

How do you do glass fusing?
To do glass fusing, you’ll need a kiln that can reach high temperatures. You’ll also need to use a type of glass that can withstand the high temperatures without shattering. Fusible glass is a good option for this type of project. Once you have your materials, you’ll need to cut the glass into pieces using a glass cutter or score and snap method. Once the pieces are cut to size, you’ll need to place them on a kiln shelf in the order that you want them fused together. After the pieces are in place, you’ll need to fire up the kiln and let it run until it reaches its desired temperature. Once it reaches that temperature, you’ll need to let it cool down slowly to allow the glass to fuse together. Glass fusing is a process that involves heating up glass until it reaches a high enough temperature that it melts and becomes pliable. You can then shape the glass into whatever form you desire. Fusible glass is a type of glass that is specifically designed to be used in fused projects. It can withstand high temperatures without shattering, making it ideal for this type of project.
How do you tie sea glass?
The most common way to tie sea glass is with a fishing line. You will need a sharp knife to make a small incision in the top of the glass, then thread the fishing line through. Make sure to knot the line securely so that your sea glass wind chime doesn’t come undone! If you’re looking for a more permanent solution, you can also glue the sea glass pieces together. We recommend using E6000 adhesive, as it’s very strong and weather-resistant. Just apply a small amount of glue to each piece of sea glass, then let it dry completely before hanging up your wind chime. There are a few different things to consider when choosing the right materials for your wind chime. The first is the type of sound that you want it to make. Bamboo and wood will create a more mellow sound, while metal or glass will have a brighter tone. Another thing to think about is the amount of maintenance that you’re willing to do. Bamboo and wood will need to be sealed periodically to prevent them from rotting, while metal and glass can be left as-is. Finally, consider the overall look that you’re going for. Bamboo and wood wind chimes have a more natural look, while metal and glass chimes can be more modern or eclectic. Once you’ve decided on the materials you want to use, it’s time to start putting your wind chime together!
How do you glue sea glass to wood?
To glue sea glass to wood, you will need a strong adhesive. I recommend using E-6000 Adhesive. This adhesive is waterproof and will hold your sea glass securely to the wood. Gently apply adhesive to the back of your sea glass and press it into place on top of the wood. Wait 24 hours for the adhesive to dry before hanging your wind chime.
Can you find sea glass in rivers?
Yes, you can find sea glass in rivers. However, it is much more common to find sea glass on beaches where it has been tumbled by the waves over time. The smooth texture of river glass is a result of years of being worn down by the water. If you are looking for river glass, I recommend checking out local antique stores or flea markets. When gluing sea glass to wood, use a strong adhesive such as E-6000 Adhesive. This will ensure that your sea glass is securely attached to the wood. Apply a small amount of adhesive to the back of the sea glass and press it firmly into place on the wood. Allow the adhesive to dry for 24 hours before hanging your wind chime.
Which glue is best for glass?
There are a few different types of glue that can be used for glass, but the best one to use is epoxy. Epoxy is a strong adhesive that will create a permanent bond between the glass pieces. It is also waterproof, so it will not come undone if it gets wet. Another type of glue that can be used is clear silicone. Silicone is not as strong as epoxy, but it will still hold the glass pieces together securely. It is also more flexible than epoxy, so it can be a good choice if you are worried about the glass breaking.
How do you hang a wind chime without making a hole?
If you don’t want to make a hole in your wall or door, you can use suction cups to hang your wind chime. You can find suction cups of different sizes at most hardware stores. You will need to find chimes that are heavy-duty enough to support the weight of your wind chime. Command strips, for example, are a popular and forgiving alternative. These adhesive strips can be affixed to most surfaces without causing any damage. They are also easy to remove when you want to take the wind chime down. Hang the wind chime in whichever fashion you like, but be sure it does not fall and break.
Useful Video: HOW TO MAKE – FAUX SEA GLASS MOBILE – & WIND CHIME
Conclusion
Overall, making your own glass wind chimes is a fun and rewarding process. By following the steps outlined in this guide, you’ll be sure to end up with a beautiful and unique product that will last for years to come. Thanks for reading! We hope you found this article helpful. If you have any questions or comments, feel free to leave them below. This is the end of my post on how to make glass wind chimes! I hope you enjoyed it and found it helpful. If you have any questions or comments, please leave them below. Thanks for reading!
References
- https://rhythmsofplay.com/diy-sea-glass-wind-chime-suncatcher/
- https://www.motherearthnews.com/diy/glass-wind-chimes-zmaz80mazraw/
- https://thecraftyblogstalker.com/diy-sea-glass-wind-chime-craft-kit/
- https://ourpastimes.com/how-to-make-stained-glass-wind-chimes-13412350.html