Looking for a creative way to reuse old wine bottles? Why not try making wine bottle wind chimes! This fun DIY project is easy to do and can be customized to fit your unique style. Learn how to make wine bottle wind chimes from an experienced crafter, with product reviews and tips included. We’ll also show you where to find the best deals on supplies so you can get started right away!
Table of Contents
Materials for wine bottle wind chimes
You will need the following materials to make your own wine bottle wind chimes:
- Wine bottles in various sizes and colors (we recommend using at least three)
- A drill with a glass cutting bit
- String or fishing line
- Decorative beads, charms, and/or other trinkets (optional)
- Paint or markers (optional)
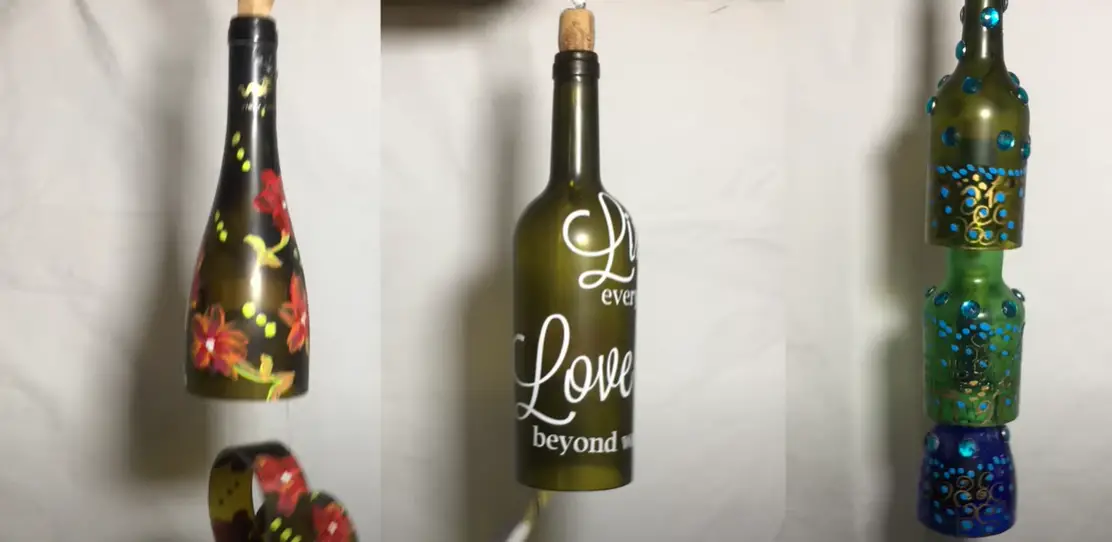
The first step is to clean and dry your wine bottles. Once they are clean, you can decide whether or not to paint them. If you choose to paint them, we recommend using light colors that will complement the natural light coming through the glass. Once your paint is dry, it’s time to start drilling! Drill a hole in the center of the bottle’s bottom, making sure that the hole is big enough to fit your string or fishing line through. [1]
If you’re using string, thread it through the hole and tie a knot to secure it. If you’re using a fishing line, simply feed it through the hole and leave a bit of extra at the end so you can tie a knot later. Once your string or fishing line is in place, start adding beads, charms, and other trinkets! You can get as creative as you like with this step, so have fun and let your imagination run wild. When you’re finished decorating, tie a knot at the top of the bottle to secure everything in place.
How to remove labels from wine bottles
If you want your wine bottle wind chimes to look their best, you’ll need to remove the labels from the bottles. This can be a bit of a hassle, but it’s worth it in the end.
There are a few different ways that you can remove labels from wine bottles. You can use a product like Goo Gone, which is specifically designed to remove sticky residues. Or, you can try using a little bit of cooking oil or WD-40. Just apply some of the oil to a cotton ball or rag and rub it onto the label until it starts to come off.
Once the label is removed, you’ll need to clean the residue off of the glass. The easiest way to do this is to soak the bottle in a sink full of warm, soapy water. Let it soak for a few hours, and then scrub at the residue with a sponge or brush.
If you’re having trouble getting all of the residue off, you can try using a little bit of white vinegar. Just dilute the vinegar with water and apply it to the affected areas. Let it sit for a few minutes, and then rinse it off.
Once you’ve removed the labels and cleaned the bottles, you’re ready to start making your wind chimes! [2]
Step-by-step guide make the wine bottle wind chimes
In this part, we’ll show you how to make wine bottle wind chimes step by step.
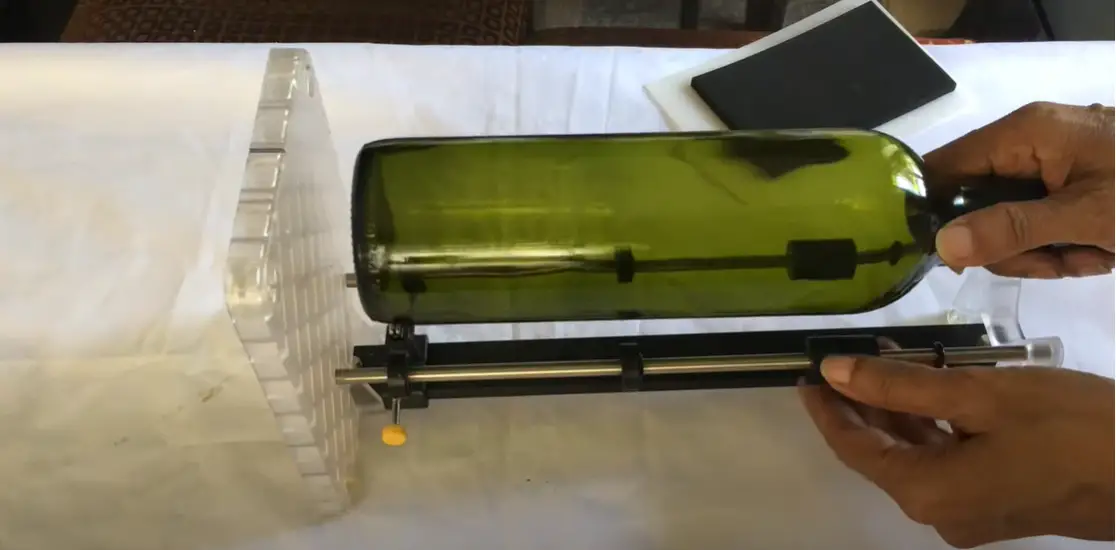
Cutting the Bottle
The first step is to cut the bottle. You will need a sharp knife for this. We recommend using a utility knife or a box cutter.
Start by making a small hole in the bottom of the bottle. Then, make a larger hole near the top of the bottle. The size of these holes will depend on the size of your string or wire.
Next, use your knife to make two slits around the middle of the bottle. These slits should be about an inch apart.
Now, you can start cutting along the slits to create four equal pieces. Be careful not to cut yourself! Once you have four pieces, smooth out any sharp edges with sandpaper.
You should now have four equal pieces of glass. The next step is to drill holes in the top two pieces. Drill a hole in the center of each piece. Then, use a drill bit that is slightly larger than the diameter of your string or wire. [3] Now, thread your string or wire through the holes and tie it off. You can now move on to the next step!
Adding the Hanging Chain
The next step is to add the hanging chain. You will need a length of chain that is long enough to allow the chimes to hang down freely without touching the ground. A good rule of thumb is to measure out a length of chain that is twice as long as you want the chimes to be. For example, if you want your chimes to be one foot long, then you will need two feet of chain.
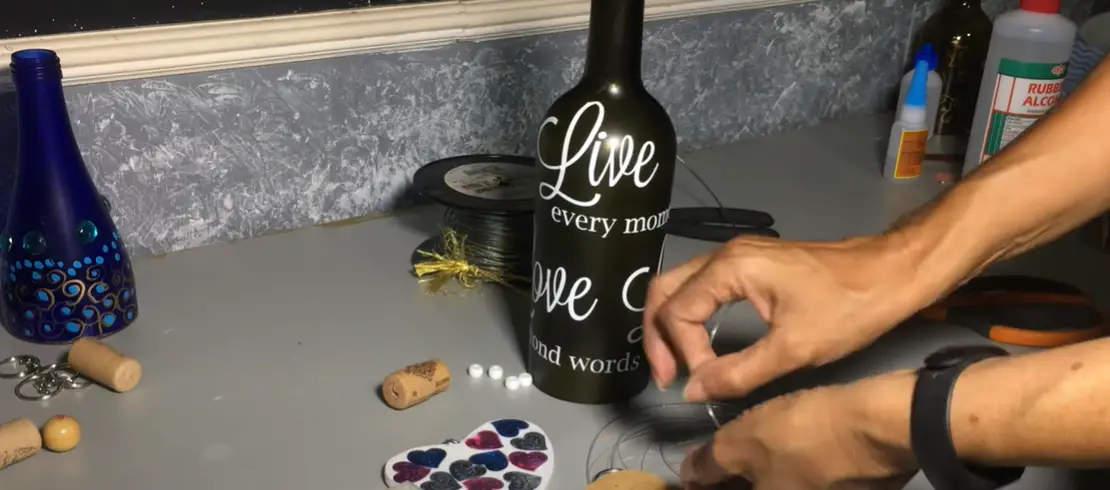
Once you have your length of chain, use a pair of pliers to attach it securely to the top loop on each wine bottle. Make sure that the bottles are evenly spaced along the length of the chain so that they will all make a sound when they hit each other in the wind.
Your wine bottle wind chimes are now ready to hang up and enjoy. Make sure to place them in a spot where they will get plenty of airflow, such as near an open window or door. And if you want to add a little extra personality to your chimes, try painting the bottles with colorful designs or wrapping them in twine or ribbon. Whatever you do, just have fun and enjoy your new homemade decoration!
Adding the Wind Catch
The next step is to add the wind catch. This piece is what makes the chime move in the wind. It attaches to the top of the bottle and has a small hole in it for the string to go through. You can find these at most craft stores or online. Just make sure that the size of the hole is big enough for your string to fit through easily.
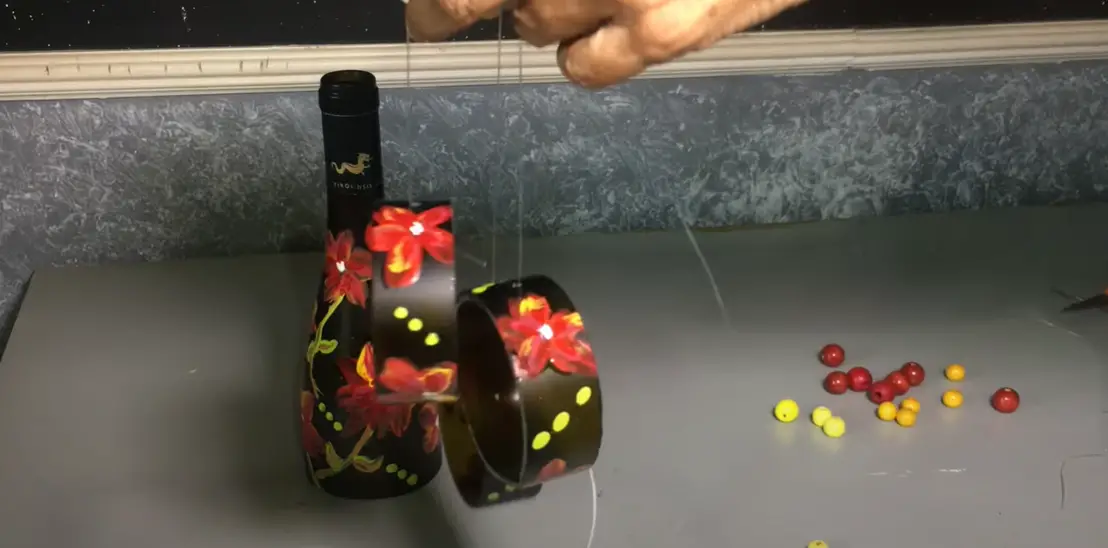
Start by threading the beads onto the string, one at a time. You can make your chime as long or short as you like, just remember to leave enough slack so that the chime can move freely when it’s hung up. Once you’ve added all of your beads, tie another knot at the end of the string to keep them in place. [4]
Now all that’s left to do is hang up your new wine bottle wind chime and enjoy! If you found this guide helpful, please share it with your friends. And if you have any tips or tricks of your own, feel free to leave them in the comments below.
FAQ
How do you cut glass for wind chimes?
You will need a few tools to cut glass for your wind chimes. A tile saw or a wet saw with a diamond blade is the best option. You can also use a glass cutter and running pliers.
Cutting wine bottles is not as difficult as it may seem. First, you need to score the bottle where you want to make your cut. Make sure to wear gloves and safety glasses when working with glass. Use a ruler or other straight edge to guide your glass cutter along the score line. Apply even pressure as you trace around the entire circumference of the bottle.
Now, take your running pliers and place them right above the score line on both sides of the bottle. Apply even pressure as you slowly twist the bottle until it snaps in two. If the glass is not breaking evenly, you can use a hammer to tap on theScore line until it breaks cleanly.
What materials make good wind chimes?
Wind chimes can be made from a variety of materials, including metal, glass, wood, and plastic. The type of material you choose will depend on the look and sound you want to achieve.
Metal wind chimes have a deep, resonant sound and can be very beautiful. They are also quite durable, so they can withstand being outdoors in all kinds of weather. Glass wind chimes have a more delicate sound and are often more decorative than functional. They require more care than metal or wood wind chimes, but if you take good care of them, they can last for many years.
Wooden wind chimes have a natural look and usually produce softer, gentler sounds than metal ones. They are also very durable and can withstand the elements well.
Plastic wind chimes are the most affordable option, but they don’t usually last as long as other types of wind chimes. They can also produce a harsher sound than other materials.
What is the best string for wind chimes?
The best string for your wind chimes is usually nylon or fishing line. Nylon is strong and durable, making it ideal for outdoor use. Fishing line is less likely to tangle, making it a good choice for smaller projects.
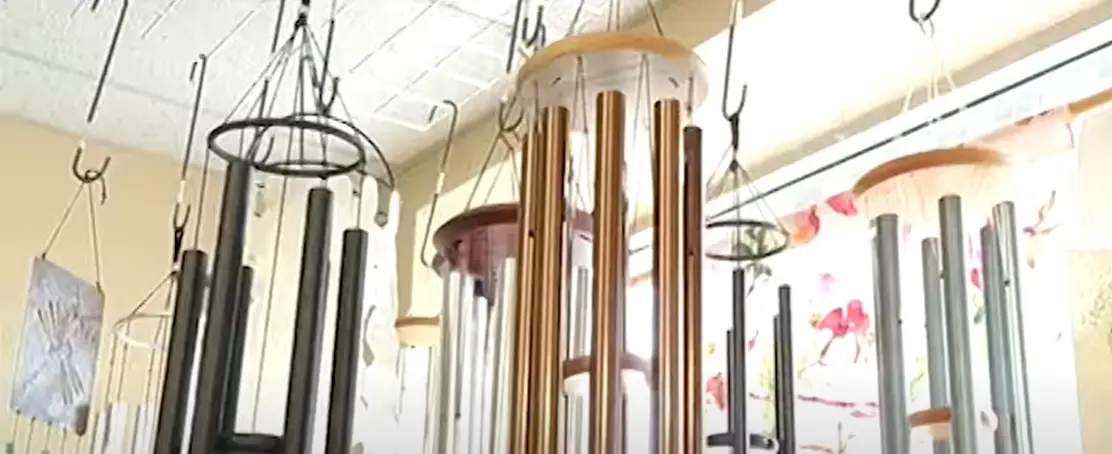
Some people like to use colorful string or ribbon for their wind chimes. This can add a fun pop of color to your project! Just be sure to choose a material that will hold up in the weather.
When it comes to wind chimes, there are lots of different materials you can use. It really just depends on your personal preference! If you’re looking for a more natural look, wood or bamboo might be the way to go. For a more modern feel, metal or glass might be better suited for you. And if you’re looking for something a little bit different, there are even wind chimes made from recycled materials like bottles or cans.
No matter what material you choose, the most important thing is that you enjoy your wind chimes! Hang them outside your window so you can enjoy their soothing sound every time the breeze blows. Or give them as a gift to a friend who could use some extra relaxation in their life. Either way, you’re sure to bring a little bit of peace and tranquility into your world.
How do you make a tubular wind chime?
Tubular wind chimes are easy to make and add a beautiful touch to any outdoor space. All you need is a few supplies and some basic instructions.
First, gather your materials. You will need:
- A length of PVC pipe
- PVC end caps
- PVC adhesive
- Wine bottles
- Twine or string
- A drill
Next, measure and cut your PVC pipe into the desired length. Then, attach the end caps to each end of the pipe using PVC adhesive.
Now it’s time to prepare your wine bottles. Using a drill, make a small hole in the bottom of each bottle. The hole should be big enough to fit the twine or string through.
Thread the twine or string through the holes in the bottles and tie a knot to secure. Then, hang your wine bottle wind chime from a hook or other sturdy object.
You’ve now made your very own tubular wind chime. Enjoy the soothing sound of the wind passing through your new decoration.
What size cord do you use for wind chimes?
The size of the cord you use will depend on the weight of your wine bottles. For example, if you are using standard 750ml wine bottles, we recommend using twine or jute that is at least 0.75cm in thickness. This will ensure that your wind chimes can withstand moderate winds without breaking. If you live in an area with higher winds, you may want to use a thicker cord such as rope that is at least
As for the length of the cord, this will depend on how many wine bottles you are using and how long you want your wind chimes to be. A good rule of thumb is to allow for about 30-35cm of cord between each bottle. This way, your wind chimes will have a nice, even spacing and won’t be too crowded.
Start by tying a knot at the end of your cord. Then, thread the cord through the neck of the first bottle. Once the cord is through, tie another knot to secure the bottle in place. Repeat this process for each bottle until all are strung up.
Once all of your bottles are in place, it’s time to add a bit of decoration! You can do this by adding beads, shells, or other small trinkets between each bottle. Simply thread these onto the cord before tying each knot. This will add a bit of sparkle and personality to your wind chimes.
How thick is the wind chime cord?
The cord should be thick enough to support the weight of the wine bottles, but not so thick that it overpowers the look of the chimes. A good rule of thumb is to use a cord that is one-eighth to one-quarter inch in diameter.
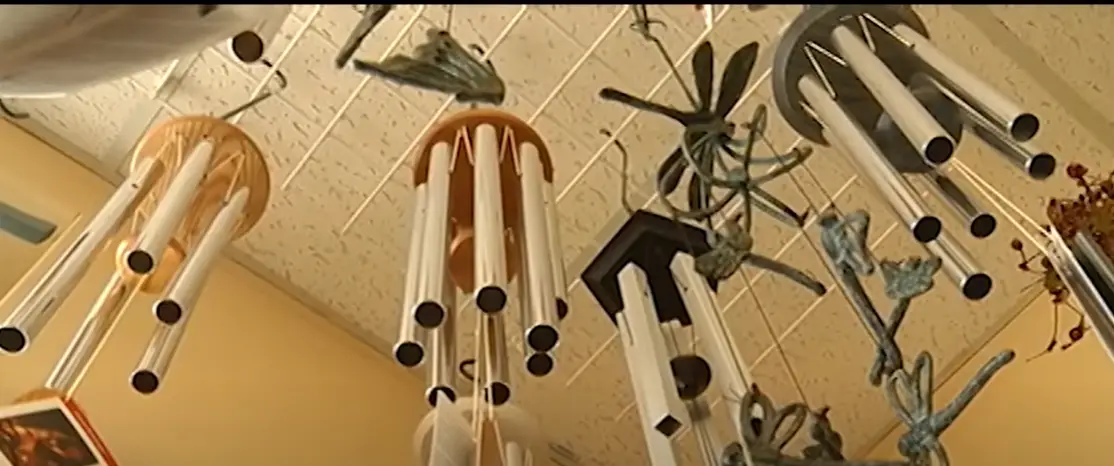
If you are using multiple bottles of different sizes, you will need to adjust the length of each cord accordingly. The larger the bottle, the longer the cord should be. You can use a ruler or measuring tape to get an accurate measurement.
Another option is to buy pre-made cords that are already cut to size and have hooks on each end for easy attachment. These can be found at most craft stores or online retailers.
Once you have all of your supplies, you are ready to start making your wine bottle wind chimes!
What kind of pipe is used for wind chimes?
The most common type of pipe used for wind chimes is PVC. PVC is a durable and weather-resistant material that can withstand the elements. It is also relatively inexpensive, making it a good choice for those on a budget.
PVC pipes come in a variety of diameters, so you can find one that is the perfect size for your wine bottles. You will also need to get some end caps to seal off the ends of the pipes. These can be found at most hardware stores.
No matter what type of pipe you use, make sure it is clean and free of any debris before you start to assemble your wind chimes. Any dirt or grime on the pipes will dampen the sound of the chimes.
Once you have all of your materials, you are ready to start making your wind chimes! Follow these simple steps to create beautiful and unique wine bottle wind chimes.
First, decide how many bottles you want to use for your wind chimes. It is important to evenly space out the bottles so they make a pleasant sound when they clink together. You can mark where each bottle should go with a permanent marker.
Next, cut your PVC pipes to the correct length. The pipes should be slightly longer than the height of your bottles.
Then, thread the end of each pipe through the top of a bottle. You may need to use a funnel to help get the pipes started. Once all of the pipes are threaded through the bottles, seal off the ends with the end caps.
Finally, hang your wind chimes from a hook or nail in a location where they will catch the breeze. Listen to the soothing sound of your new wind chimes as they dance in the wind!
Can you use a paracord for wind chimes?
Yes, you can use a paracord for wind chimes. You will need to measure the length of the cord and cut it to size. Then, you will need to knot the cord at the top of the wine bottle. After that, you will need to thread the cord through the holes in the bottom of the wine bottle. Finally, you will need to tie a loop in the end of the cord and hang it from a hook or nail.
If you are using a glass bottle, we recommend using a clear or white paracord so that it is less visible. If you are using a plastic bottle, any color paracord will work.
Useful Video: DIY Wine bottle Wind Chimes | How to cut glass | Creator’s bottle cutter
Conclusion
Now that you know how to make wine bottle wind chimes, it’s time to get out there and start creating your own! These charming homemade decorations are perfect for adding a touch of personality to your outdoor space. And, with so many different ways to customize them, you’re sure to find a design that fits your style perfectly. So what are you waiting for? Grab some wine bottles and start crafting! We hope you found this guide helpful. If you have any questions or comments, please feel free to reach out to us. And be sure to check out our other articles for more great DIY projects and tips! Thanks for reading!
References:
- https://diyjoy.com/how-to-make-a-wine-bottle-wind-chime/
- https://www.homedit.com/glass-bottle-wind-chime/
- https://www.instructables.com/Make-a-Glass-Bottle-Wind-Chime/
- https://www.wikihow.com/Make-Wine-Bottle-Wind-Chime


Leave a Reply