
Every musician knows the thrill of creating something beautiful and inspiring from seemingly nothing. With tin can wind chimes, you too can craft a one-of-a-kind piece of music that will take your breath away. This guide will provide you with all the essential tips and tricks to make beautiful music from recycled materials – exploring how to make tin can wind chimes that are sure to bring peace and joy into any home or garden.
Table of Contents
Tin Can Wind Chimes Guide
Making wind chimes with recycled materials is a great way to give old items a second life and add beauty to your home. Tin can wind chimes are an easy craft that doesn’t require any special tools or skills. All you need is some imagination and some basic supplies. With this guide, you’ll learn how to make tin can wind chimes in no time!
First, you’ll want to gather your supplies. You will need several tin cans of different sizes (empty and washed), string or twine, scissors, tacky glue, markers for decoration (optional), and decorations such as beads or buttons (also optional).
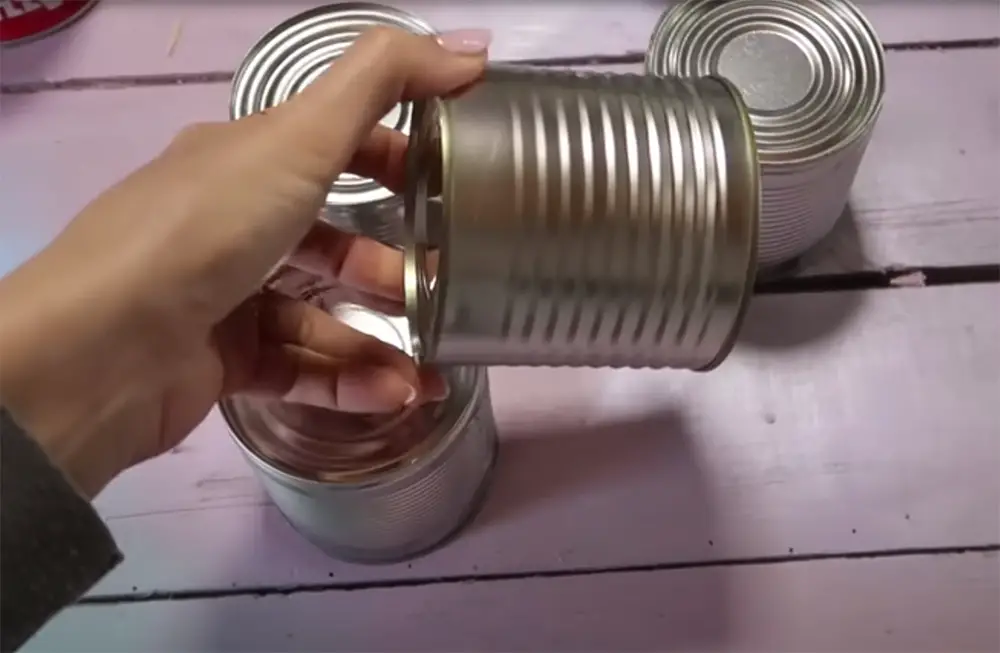
Once you have all of your materials ready, it’s time to start crafting your tin can wind chimes. Begin by taking one of the smaller cans and cutting a small hole in the bottom using scissors. Make sure the hole is large enough for your string to fit through. Then, repeat this step with each of your other cans, making different sized holes depending on their size.
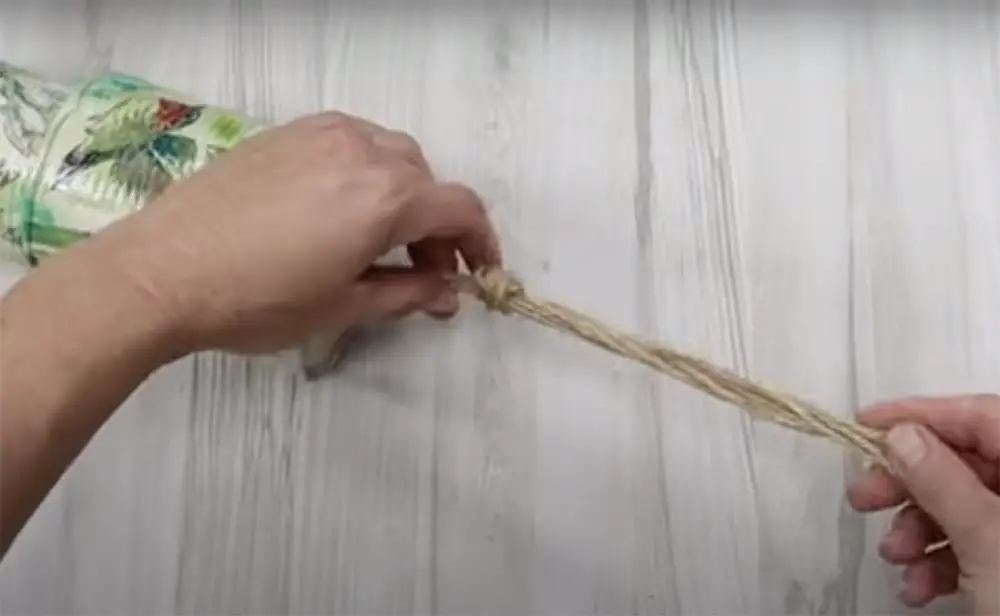
Next, thread string or twine through each of the tin cans, tying a knot at the end. Leave some string hanging from both sides of each can so that they hang at different lengths when hung up. Once you have all your cans threaded onto the string, tie them together at the top with an extra piece of string or twine.
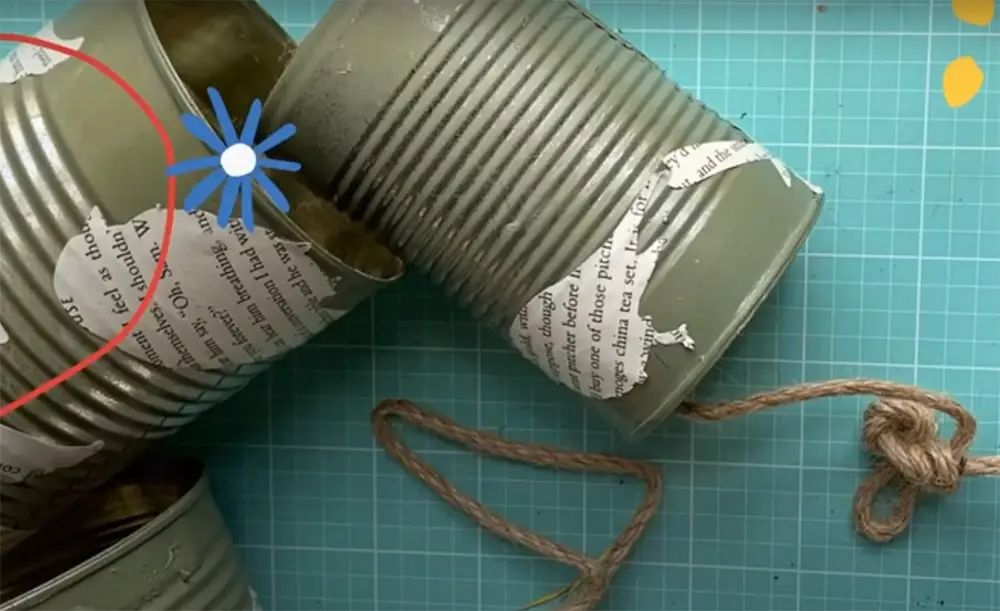
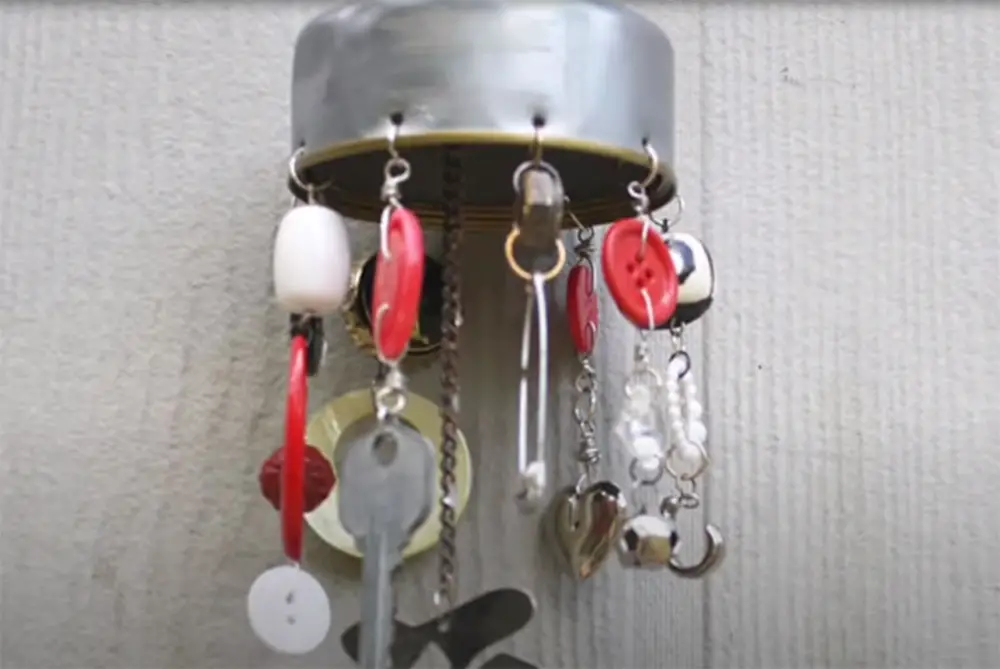
Now it’s time to add decorations! You can use markers to draw patterns and designs on the outside of the cans or glue on some beads or buttons. You can also add pieces of ribbon or fabric for a more colorful look.
Once you have added all your decorations, you are ready to hang up your wind chimes! Hang them from a branch in your yard, or an outdoor patio. The breeze will cause the tin cans to clink together and make beautiful music! Enjoy your handiwork and the unique sound it makes as you relax outdoors.
What is a Wind Chime Used For?
Wind chimes are used for a variety of reasons. Some people hang them as decorations, others use them to make their outdoor space more peaceful and inviting. Wind chimes can also be used to mark special occasions or just celebrate the beauty of nature. They are often hung in places where there is plenty of wind to create beautiful music when they move in the breeze.
What Should I Hang The Tin Cans From?
When it comes to making your own wind chimes, you have a few options for hanging the tin cans. The simplest and perhaps most popular option is to tie string or thread between two trees. Doing this will create a makeshift outdoor gazebo where you can hang the tin cans from various lengths of strings. Another great option is to use bamboo poles or curtain rods that are securely fastened together with nails or screws in order to suspend the tin cans from them. Whichever option you choose, be sure that it’s sturdy and secure enough so that your wind chimes won’t come crashing down in a gust of wind! Finally, if you don’t have any trees or poles available, you could even hang the tin cans from a strong branch or beam inside your home. Just make sure that you secure it properly and be mindful of any potential hazards like low-hanging light fixtures or other items in the space.
Can I Use The Cans as Bird Feeders?
Yes, you can. However, if you are using the cans as bird feeders, please take extra precautions when drilling holes or attaching strings to them. Make sure the sharp edges of the cans are not exposed and will not harm any birds that come in contact with them. Additionally, it is recommended that you use food-grade paint on your cans and seal them with a water-resistant coating so that they last longer. Doing this will also help minimize rust buildup on the cans and make them more attractive for birds to visit!
Where Should I Hang This Wind Chime?
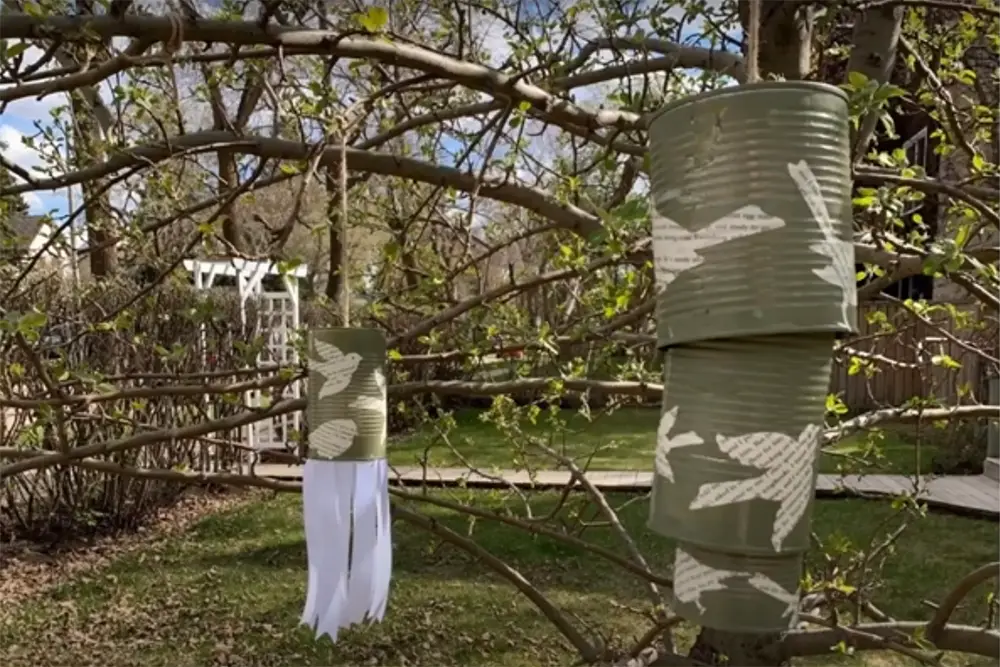
Once you’ve made your wind chime, the next step is to decide where you want it hung. An outdoor porch or patio is a great spot for a tin can wind chime because they look beautiful in natural settings and make lovely sounds when the wind blows. However, if you’re hanging it indoors, try to pick an area near an open window that will let plenty of airflow through. Your wind chime will sound best if it’s in direct sunlight as the heat from the sun helps to move air around it more quickly.
Also keep in mind that some locations may be better suited than others depending on their location and what type of sound you are aiming for from your wind chime. For example, if you want a loud chime, you may want to hang it in an area where it will get more airflow, like near open windows and balconies. On the other hand, if you’re looking for a more subtle tinkling sound, try hanging it in an area that is less exposed to wind. [1]
No matter where you choose to hang your tin can wind chimes, they are sure to add beauty and charm to any environment! Have fun with it and enjoy creating something unique for your home or garden!
Rough Edges on Tin Cans
Most tin cans come with jagged edges, which can make the wind chime sound unpleasant. The best way to get rid of these rough edges is by filing them down using a metal file. Start from one end and work your way around in small, even strokes until all the sharp edges are gone. You can also use sandpaper or a block plane if you have one handy. If you want an extra smooth finish, try sanding it down with fine-grit sandpaper. Once all the rough edges have been removed, wipe off any residue with a damp cloth before moving on to the next step!
How to Make Tin Can Wind Chimes
Supplies
Making your own tin can wind chimes is an easy and fun DIY project. Here’s what you’ll need to get started:
- Tin cans (the bigger the better, as they will create a louder sound)
- String or cord
- Scissors
- Hammer and nails
- Something to hang them from (a branch or sturdy hook works well)
- Decorative elements such as beads, shells, or charms (optional).
Once you have all your materials ready, it’s time to start making your wind chimes!
Directions
- Start by cleaning out your tin cans and making sure there are no sharp edges.
- Use the hammer and nails to make a small hole in the top and bottom of each can.
- Cut four pieces of string or cord, one for each hole in the can, making sure it’s long enough that when you hang them up they will reach from the hanging point to the ground.
- Tie one end of the strings through each hole on the cans, leaving enough slack so that when hung they will make a pleasant sound when moved by wind or touched gently with your fingers.
- Now it’s time to add some decorative elements if desired! Attach beads, shells, or charms to each string.
- Finally, hang your wind chimes from a sturdy hook or branch and enjoy the soothing sound they make in the breeze! [2]
Hanging Your Wind Chimes
Once you’ve finished shaping your tin cans into whatever design you’d like, it’s time to hang them. You can use anything from wire, twine, or string to secure your wind chime. Start by cutting a length of whatever material you decide on and attach one end to the top loop of the tin can. Secure the other end in place with a knot at the bottom loop of the tin can. Make sure that all knots are tight! Once your tin cans are securely attached, you can hang up your wind chimes wherever you want — indoors or outdoors — and enjoy their calming melodies!
Experiment with Sound
Once the basic structure of the wind chimes is complete, it’s time to experiment with sound! This is where you’ll get creative and have some fun. Different-sized cans will produce different tones when struck by the wood or metal clappers. To test this out, you can put your ear close to each one and tap on them until they are tuned just how you like them. You should also try rearranging their order while gently striking them to get the desired effect.
Additionally, adding more than one clapper per can creates a more complex sound and give your wind chime that unique touch that sets it apart from all others! Just make sure that all of the clappers are hung at different lengths, so that each one will chime at a different pitch.
Finally, don’t be afraid to experiment with other objects in your wind chimes! If you’ve got some old metal spoons lying around, for example, why not see what kind of sound they make when struck against the cans? You can even add little charms or bells to give them an extra special touch! Have fun and let your creativity shine through – after all, it’s YOUR unique wind chime! [3]
Additional Tips
After you have finished creating your basic wind chime, there are a few additional tips to help make the experience even more enjoyable.
1) To create an extra special effect with your wind chime, try painting the cans in various colors or patterns and arranging them by color.
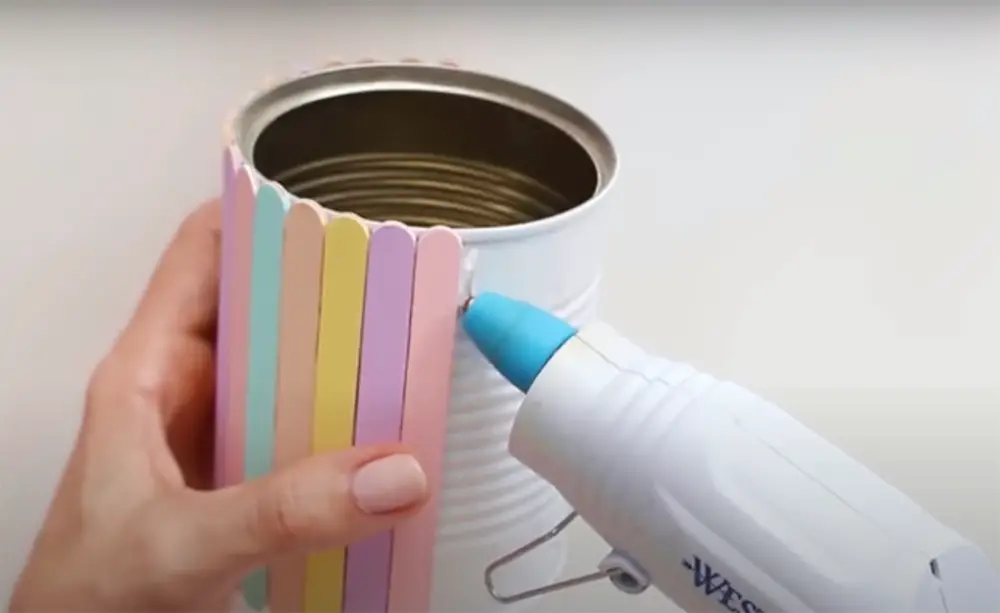
2) You can also place small decorations inside each can such as beads, feathers, or shells. This will add an interesting visual element to your creation.
3) To ensure that the wind chime makes different tones when it moves in the breeze, use cans of different sizes and shapes. This will give your wind chime a unique sound when it is moved around by the wind.
4) If you want to add a bit of sparkle to your wind chime, you can hang shiny or colorful beads or pieces of jewelry from it.
Creating wind chimes is a fun and creative activity that yields beautiful results. With these tips, you’ll be able to make a unique and eye-catching piece that will bring beauty and music to your home for years to come!
FAQ
How do you make a tin can wind chime?
Making a tin can wind chime is an easy DIY project and will only take you about 30 minutes to make! You will need empty tin cans, string, scissors, and something to hang your chimes from. To begin, cut the strings into equal lengths of about 18”-24” each. Tie one end of each string onto the tin can handle and then tie the other ends together in a knot at the top of the hanging device. Finally, hang your wind chime outside or inside and enjoy the soothing sounds it makes with every breeze!
What is the best metal for wind chimes?
When it comes to wind chimes, the best metal is usually aluminum or tin. Aluminum and tin have the perfect combination of lightness and strength for making the most beautiful, melodious wind chimes. The lightweight nature of these metals also allows them to easily swing in the breeze, creating a soft and soothing sound as they move. Tin is especially popular for making wind chimes since its malleability makes it easy to cut into different shapes that produce unique sounds when hit by the wind. Simply put, if you want your homemade wind chimes to make beautiful music, then aluminum or tin is definitely your best bet! [4]
How do you make a wind chime out of soda cans?
Making a wind chime out of soda cans is a fun, easy craft project that requires very few supplies. All you need are some empty soda cans, sturdy string or twine, and scissors. With just those three items, you can make a beautiful and unique wind chime for your home or garden!
First, decide what type of design you’d like to create with your wind chime. You can either tie all the cans together in one long line from top to bottom (this will give off more of a soft tinkling sound when the breeze hits it), or create multiple tiers of different-sized cans that hang at various levels (which will give off more melodic tones). Once you’ve decided on your design, you’ll need to measure and cut the string or twine accordingly.
Next, tie each can to the string or twine in whatever pattern you’d like. You may want to use a different color of string for each tier if you’re creating a multilayered wind chime. To make sure that each can hangs securely, tie two knots at either end of the can — one around the top hole and one around the bottom. Once all your cans are secure, hang up your wind chime with sturdy hooks and watch it dance as the breeze blows through it! [5]
Making wind chimes out of soda cans is not only an easy craft project but also a great way to reuse and repurpose materials that would otherwise be thrown away. So take out those empty cans and start creating!
How do you make homemade wind chimes?
Making a homemade wind chime is an easy and fun project for both adults and children alike. With just some simple materials, you can create your own beautiful wind chime in no time!
First, gather the necessary supplies. For this project, you will need tin cans (preferably of different sizes), something to cut the cans with such as scissors or a utility knife, string, beads or bells for decoration (optional), paint and brush (optional).
Once all the supplies are ready, it’s time to make the wind chimes! Start by cutting out circles from each of the tin cans; these circles will be what your string attaches to. Make sure not to cut too large as this can affect the sound of your wind chime. The smaller, the better.
Once all of the pieces are cut out and decorated, it’s time to assemble your wind chime! Take some string and tie each circle securely onto its own length of a string. Tie knots at both ends so that they won’t slip off. Now take another piece of string and loop one end through each of the circles, almost like a daisy chain. Make sure to tie knots at both ends so everything stays in place.
Once all of the pieces are connected with string, hang up your wind chime and enjoy! Experiment with different sizes and shapes of tin cans to see how it affects the sound, or add more decorations for extra pizzazz. With just a few materials, you can create something beautiful that will bring joy to your home for years to come.
Useful Video: How to make a Wind Chime reusing tin cans! Can Chime
Conclusion
Once you have finished your tin can wind chime, you can sit back and enjoy the peaceful sound it makes every time the wind blows. Hang your new creation in a sunny spot where it will be able to catch all of nature’s breezes and fill your space with its calming tunes.
Creating a unique piece of art from something as simple as an old tin can is one of life’s small pleasures, and we hope our guide has motivated you to give it a try! Have fun creating your own special version of this classic decoration. Good luck!
References:
- https://www.diyncrafts.com/134752/home/tin-can-windchimes
- https://singlegirlsdiy.com/tin-can-wind-chimes/
- https://handsonaswegrow.com/outdoor-music-diy-wind-chimes/
- https://www.onlinemetals.com/en/diy-metal-wind-chimes
- https://www.instructables.com/Soda-Can-Wind-Chime/